


How to Assemble Y Velo Junior Balance Bike: A Step-by-Step Guide
-
Open the Box Safely (The outer box may be different over time)
- Use a safety knife to carefully cut along the tape on the edges of the box. Make sure to avoid cutting too deep to prevent damaging the contents inside.
-
Separate the Contents
- Remove all parts and components from the box. Lay them out on a flat surface for easy access.
-
Assemble the Front Wheel
- Take the front wheel stem and guide it through the tube of the bike frame.
- Place the blue cap over the top of the stem and then insert the handlebar stem into the tube.
-
Secure the Handlebars
- Use the supplied bolt and nut to attach the handlebar stem to the bike.
- Start by tightening the bolt and nut with your fingers to ensure they are properly aligned.
- Once aligned, use the two Allen keys provided, turning them in opposite directions to securely tighten the bolt and nut.
-
Install the Seat
- Insert the seat post into the designated slot on the bike frame.
- Adjust the seat height to your preference using the supplied fixings.
- Turn the fixings clockwise to lock the seat firmly into place.
-
Final Check
- Double-check all parts to ensure everything is tightly secured and properly assembled.
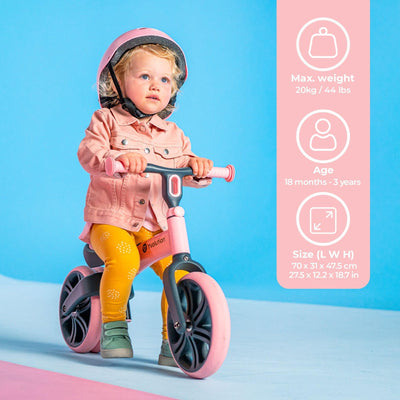
Congratulations! Your Y Velo Balance Bike for Toddler is now fully assembled and ready for use. Enjoy your new balance bike!